Simple Steps for Installing Your New Door Hinges
The most critical first step for installing new door hinges is accurate measurement. This single action ensures perfect alignment and prevents common problems with all hinge types, from a standard Stainless Steel Butt Hinge to self-closing Adjustable Spring Hinge models. An improper fit leads to significant issues, including:
·Sticking or scraping doors that hinder movement.
·Reduced door lifespan from continuous strain.
·Compromised home security due to gaps.
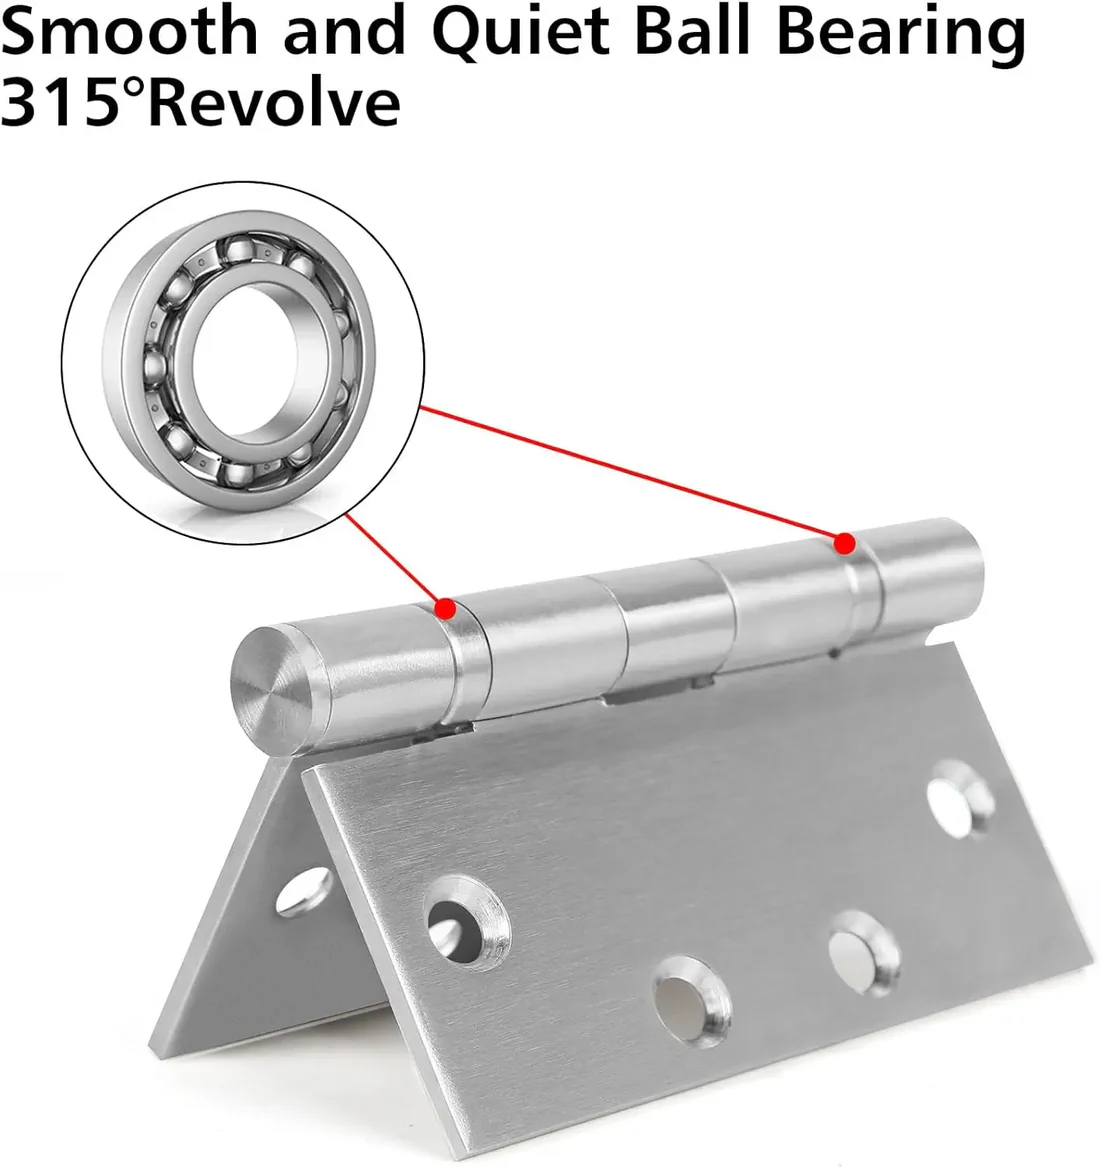
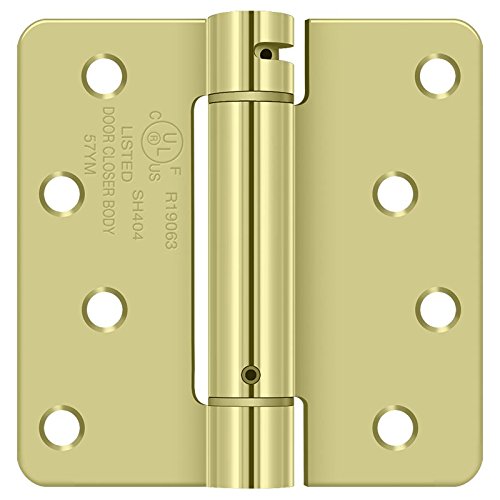
Properly installed spring hinges, for example, rely on precise placement to function correctly and provide the desired self-closing action without putting undue stress on the door or frame.
Gather Your Essential Tools and Materials
Proper preparation is fundamental to a successful installation. An installer ensures a smooth workflow by assembling all necessary tools and materials before beginning the project. This simple step prevents interruptions and helps maintain focus on the task at hand. A well-organized workspace is a safe and efficient workspace.
Must-Have Tools
Precision work requires the right equipment. A professional result depends on having these essential tools ready.
·Tape Measure & Pencil
·Utility Knife
·Power Drill with Drill Bits
·A Sharp Chisel Set (1-inch is ideal)
·Wooden or Rubber Mallet
·Screwdriver or Driver Bit
Pro Tip: For creating exceptionally clean mortises, some professionals prefer specialized tools. A Lie Nielsen butt mortise plane is an excellent old-school option for achieving perfect depth and clean edges.
Materials Checklist
An installer should select materials based on the specific door and frame. The choice of door hinges and screws is critical for stability and long-term function. The checklist includes new hinges, like a standard Stainless Steel Butt Hinge or a self-closing Adjustable Spring Hinge, and the correct screws.
| Door Type | Recommended Screw Size |
|---|---|
| Solid Wood (Standard Interior) | #8 x 2-1/2 inch |
| Solid Wood (Heavy Exterior) | #10 x 3 inch |
| Hollow Core Doors | #6 x 1-1/4 inch |
If replacing old hardware, one may need materials to repair the old screw holes for a secure fit.
·Wood Filler (e.g., DAP's Plastic Wood)
·3/8" Wood Dowels and Epoxy
·Glued Golf Tees
Preparing the Door and Jamb for New Door Hinges
Proper preparation of the door and jamb is the most skill-intensive part of the installation. It dictates the final fit and function. An installer ensures a professional result by dedicating focus and precision to this stage. Accurate measurements and clean mortises prevent issues like binding, sagging, and uneven gaps.
Step 1: Measure and Mark Hinge Locations
Accurate marking is the blueprint for a successful installation. An installer must determine the correct number, size, and placement of the door hinges based on the door's dimensions and weight.
First, determine the number of hinges needed. The general rule is one hinge for every 30 inches of door height.
·Doors up to 60 inches (5 ft) tall require two hinges.
·Doors between 60 and 90 inches (5-7.5 ft) need three hinges.
·Taller doors, from 90 to 120 inches (7.5-10 ft), should have four hinges.
Next, select the appropriate hinge size. The door's thickness and width are the primary factors. For instance, a standard 1-3/8" thick interior door typically uses 3.5" x 3.5" hinges. Heavier 1-3/4" thick exterior doors require larger 4" x 4" or 4.5" x 4.5" hinges for adequate support.
| Door Thickness | Door Width | Recommended Hinge Size |
|---|---|---|
| 1 ⅜” | Up to 32” | 3 ½” |
| 1 ⅜” | 32” to 36” | 4” |
| 1 ¾” | Up to 36” | 4 ½” |
With the hinges selected, an installer can mark their positions. Always start by marking the door first, not the jamb.
1.Position the Top Hinge: Measure 5 inches down from the top of the door. Place the top edge of the hinge at this mark.
2.Position the Bottom Hinge: Measure 10 inches up from the bottom of the door. Place the bottom edge of the hinge at this mark.
3.Position the Middle Hinge(s): If using three or more hinges, place the third hinge exactly halfway between the top and bottom hinges. Any additional hinges should be spaced evenly between the others.
Once a hinge is in position, hold it firmly and trace its outline onto the door's edge with a sharp pencil. A combination square helps ensure the hinge is perfectly parallel to the door's edge.
Step 2: Score and Carve the Hinge Mortise
A mortise is the shallow recess cut into the wood that allows the hinge leaf to sit flush with the surface. The depth of the mortise must exactly match the thickness of one hinge leaf. This precision ensures the door closes properly without a large gap.
An installer can create a mortise using a sharp chisel and mallet or a router with a specialized jig.
Technique Tip: For a cleaner cut, use a sharp utility knife to score the pencil outline before you begin chiseling. This prevents the wood from splintering beyond the marked area.
Using a Chisel and Mallet:
This traditional method offers excellent control.
1.Score the Outline: Carefully trace the pencil lines with a utility knife, creating a shallow groove. This defines the mortise's perimeter.
2.Make Relief Cuts: Hold a sharp chisel vertically on the scored lines and gently tap it with a mallet to deepen the perimeter. Then, make a series of shallow, angled cuts across the grain inside the mortise area, spaced about 1/4 inch apart. The chisel's bevel should face up.
3.Remove the Waste: Turn the chisel so the bevel side is up. Place it flat against the wood at the edge of the mortise. Gently pare away the waste material in thin layers. Work from the edges toward the center until the entire mortise is cleared to a uniform depth.
Using a Router:
A router with a hinge mortising jig provides speed and consistency, which is ideal for multiple doors.
1.Set Up the Jig: Adjust the router jig to match the dimensions of your hinge. Set the router bit's cutting depth to equal the thickness of the hinge leaf. It is wise to perform a test cut on a piece of scrap wood first.
2.Position and Rout: Clamp the jig securely to the door, aligning it with your pencil marks. Guide the router along the jig's template to cut the mortise.
3.Square the Corners: A router bit leaves rounded corners. Use a sharp chisel to carefully square them off for a perfect hinge fit.
After carving, place the hinge leaf into the mortise. It should sit perfectly flush with the wood surface. If it is too high or too low, the door will not hang correctly.
The Core Installation Process
With the mortises cleanly carved, the installer moves to the core mechanical phase of the project. This stage involves drilling precise pilot holes and securely attaching the hinge leaves. Careful execution here guarantees that the screws will hold firm and the hinge will operate flawlessly for years.
Step 3: Pre-Drill Pilot Holes for Screws
Pre-drilling pilot holes is a non-negotiable step for a professional installation. An installer who skips this detail risks significant problems. Driving screws directly into wood, especially hardwoods, creates immense pressure.
·It can easily fracture the wood around the mortise.
·It can cause the screw to drive in at an angle, misaligning the hinge.
The goal is to create a perfectly sized hole that guides the screw and allows its threads to grip the wood securely. An installer selects a drill bit that is slightly smaller than the screw's diameter. A self-centering drill bit, often called a Vix bit, is an excellent tool for this task. It ensures the pilot hole is perfectly centered in the hinge's screw hole.
The depth of the pilot hole is also critical. Drilling too deep removes too much material and weakens the screw's hold. An installer can easily control the depth. He measures the desired depth on the drill bit and wraps a piece of painter's tape around it as a visual stop. He then drills until the edge of the tape touches the wood surface.
The ideal depth varies based on the wood's density.
| Wood Type | Recommended Pilot Hole Depth |
|---|---|
| Hardwoods (Oak, Maple) | Two-thirds of the screw length |
| Softwoods (Pine, Fir) | Half of the screw length |
The drilling process is straightforward and requires a steady hand.
1.The installer fits the correct drill bit into the power drill.
2.He places the hinge leaf into its mortise and uses a Vix bit or an awl to mark the center of each screw hole.
3.He holds the drill perpendicular to the door's surface.
4.He drills each hole to the predetermined depth.
5.Finally, he carefully backs the drill bit out to clear any wood shavings.
Step 4: Attach the Hinge Leaves
With the pilot holes prepared, the installer can now attach the door hinges. He begins by attaching the hinge leaves to the door first, not the jamb. This approach makes it easier to align the door with the frame later.
An installer places one hinge leaf back into its corresponding mortise on the door's edge. He ensures the leaf is flush with the inside of the box and tight against one side of the mortise for perfect alignment.
Pro Tip: To avoid stripping a screw head or the wood, an installer follows a few key practices. He always uses a screwdriver bit that fits the screw head perfectly. He keeps the drill aligned straight with the screw and applies firm, steady pressure. He starts the drill on a low speed setting to drive the screw, preventing the bit from slipping and damaging the screw or the hinge's finish.
He drives one screw into the center hole of the top hinge first. Then, he drives a screw into the center hole of the bottom hinge. He repeats this for any middle hinges. He does not fully tighten the screws yet. This allows for minor adjustments. After confirming the alignment, he installs and tightens all remaining screws on the door.
Next, the installer prepares to attach the corresponding hinge leaves to the jamb. This is the final step before hanging the door.
Hanging the Door and Final Adjustments
This final phase brings the project to completion. The installer now combines the prepared door and jamb, hanging the door and performing critical checks. Precision at this stage ensures the door operates smoothly and hangs perfectly within its frame.
Step 5: Hang the Door and Test the Swing
An installer begins by positioning the door in the opening. He places wood shims or a door lifter under the door to raise it to the correct height. This aligns the hinge knuckles on the door with the knuckles on the jamb.
1.The installer carefully meshes the hinge knuckles together, starting with the top hinge.
2.He inserts the hinge pin into the top hinge to temporarily hold the door in place.
3.He aligns the middle and bottom door hinges and inserts their pins.
4.He gently taps each pin with a mallet until it is fully seated.
Note: For some hinge types, like a Stainless Steel Butt Hinge, the pin may be non-removable. In this case, the installer props the door open and attaches the jamb-side leaves directly.
With the door hung, the installer removes the shims. He performs an initial test by slowly opening and closing the door several times. He watches for any binding, scraping, or resistance. The swing should feel effortless and smooth.
How to Ensure Perfect Alignment
Perfect alignment is visible and functional. An installer checks for a consistent gap, or "reveal," around the top and sides of the door, typically about 1/8 inch wide. He also confirms the door's handing and swing direction are correct. A professional installer classifies the door's swing with a simple test:
1.He stands on the secure side of the door, where a key would be used.
2.He observes if the hinges are on the left or right side of the door.
3.He notes if the door pushes away from him or pulls toward him to open.
These observations confirm the installation matches the required door handing. If the door sticks or the reveal is uneven, the installer can make minor adjustments. He may place a thin cardboard shim behind a hinge leaf to move the door slightly. This fine-tuning is the key to a flawless, professional result.
Troubleshooting Common Installation Problems
Even a careful installer can encounter issues. Fortunately, most common problems have straightforward solutions. Addressing these issues correctly ensures a professional finish and a perfectly functioning door.
Fixing a Mortise That's Too Deep
An installer may occasionally cut a mortise too deep. This causes the hinge to sit below the wood surface, creating an improper gap. The fix is simple and requires adding a shim.
·The installer can cut a thin piece of cardboard, often from the hinge packaging itself, to the exact size of the mortise.
·He places this cardboard shim into the recess.
·Alternatively, a layer of tape applied to the underside of the hinge leaf can provide the necessary lift.
This small addition raises the hinge, allowing it to sit perfectly flush with the door's edge.
Repairing a Stripped Screw Hole
A stripped screw hole offers no grip for the screw threads. An installer can repair this with a few common materials. The toothpick method works well for minor repairs.
1.He coats several wooden toothpicks in wood glue.
2.He inserts them into the stripped hole until it is full.
3.He allows the glue to dry completely.
4.He cuts the toothpicks flush with the wood surface and drills a new pilot hole.
For a stronger, more permanent fix, an installer uses a wooden dowel. He drills out the damaged hole, glues a dowel of the same size into the opening, and lets it cure before drilling a new pilot hole.
Adjusting a Sticking or Sagging Door
A door may stick or sag for several reasons. Common causes include loose hinge screws, wood swelling from humidity, or the house foundation settling over time. An installer first checks and tightens all hinge screws. If the door still sags, he can perform a professional adjustment.
Technique Tip: Bending a hinge knuckle can correct minor sagging. The installer uses a crescent wrench to slightly bend the knuckles on the top hinge's door leaf toward the lock. This action pulls the door upward and back toward the jamb, realigning it within the frame.
An installer achieves a flawless result by following key steps. He measures accurately, carves clean mortises, and pre-drills holes for secure attachment. A final check confirms the door swings smoothly. A quality installation delivers significant long-term value:
·Enhances the home's aesthetic and market value.
·Improves curb appeal for a strong first impression.
·Represents a sound investment in the property's future.
FAQ
How often should an installer lubricate door hinges?
An installer lubricates hinges annually to prevent squeaking and ensure smooth operation. This simple maintenance extends the life of all hinge types, including a durable Stainless Steel Butt Hinge.
When should an installer choose a spring hinge?
An installer selects an Adjustable Spring Hinge for doors requiring automatic closing. These are ideal for garage entry doors or fire doors to improve safety and convenience.
Does the hinge finish affect its durability?
Yes, the finish is crucial. A quality finish protects the hinge from rust and corrosion. It ensures long-term durability and maintains the door's professional appearance.
Related articles
-
Are Your TDC Hinges Installed Correctly? Find Out
A proper TDC hinges installation results in a smooth swing, even gaps, and a flush fit. Check for correct vertical alignment, mortise depth, and secure screws.Oct-31-2025 Learn More >> -

Beyond the Lock The Importance of Secure Door Hinges
A strong lock is useless if intruders can remove your door hinges. Learn how standard hinges create a major security risk and why upgrading them is essential.Oct-31-2025 Learn More >> -
An In-Depth Look at Hinge Materials and Finishes
Select the right hinges by comparing materials like stainless steel and brass and finishes like powder coating to ensure long-term durability and corrosion resistance.Oct-31-2025 Learn More >> -

Top 10 Black Cabinet Hinges to Modernize Your Home
Considering black cabinet hinges? This guide reviews the top 10 styles, from soft-close concealed to decorative strap, to help you select the perfect hardware.Oct-31-2025 Learn More >>
Contact
Tel: +8613325838282
Add: 12819 Telegraph Road Santa Fe Springs, CA 90670
Follow Us:


