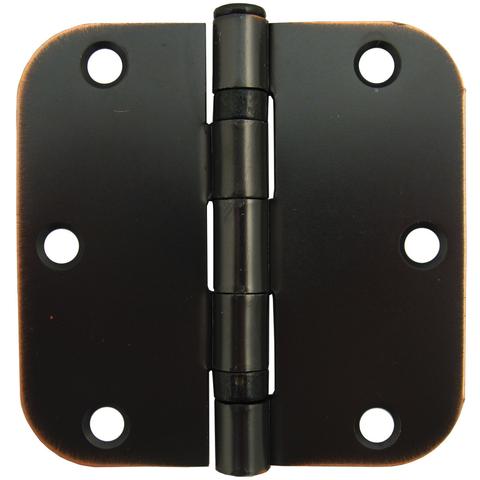
How to Install Hidden Residential Hinges A Step-by-Step Guide
How to Install Hidden Residential Hinges A Step-by-Step Guide
Installing hidden residential hinges is a straightforward project that delivers a clean, modern look. The process involves four main stages: preparing the door, installing the hinge, attaching the mounting plate, and hanging the door. The final adjustments are what truly create a professional, perfectly aligned appearance for your cabinets.
.jpg)
.jpg)
Key Takeaways
Gather the right tools and hinges before you start. This includes a drill, a hinge jig, and the correct type of hinge for your cabinet door.
Measure and mark carefully on both the door and the cabinet. This helps you drill holes in the right spots and ensures the door hangs straight.
Install the hinges on the door first, then attach the mounting plates to the cabinet. Finally, hang the door and use the adjustment screws to make it fit perfectly.
Required Tools and Materials
Gathering the correct tools and materials before starting ensures a smooth and efficient installation process. A successful project depends on having everything prepared and ready.
Essential Tools for Installation
A few key tools are necessary for a precise installation. Professionals rely on specific equipment to achieve a flawless finish. The basic toolkit should include:
A drill or driver
A concealed hinge jig for accurate hole placement
Clamps to hold the door steady
A screwdriver for manual adjustments
Pro Tip: For advanced adjustments, tools like a Hinge Doctor or specialized kits such as the HingeMate series can help fine-tune alignment and correct any door sag, ensuring perfect operation.
Choosing the Right Hinges and Screws
Selecting the proper hardware is critical for both function and appearance. The hinge type must match the cabinet door style.
Hinge SelectionEuropean-style hinges are a popular choice for their concealed design and adjustability. The door's position relative to the cabinet frame determines the correct hinge.
Full Overlay Doors: These doors completely cover the cabinet frame. They require a full overlay hinge, like the TDC C81 Hinge, which has a straight arm.
Partial Overlay Doors: These doors partially cover the frame. They use a partial overlay (half crank) hinge.
Inset Doors: These doors sit flush inside the cabinet frame. They need an inset (full crank) hinge, such as the TDC C80 Hinge, which has a significant arm bend.
Choosing the right residential hinges ensures your doors will open correctly and align perfectly.
Screw SelectionThe cabinet material dictates the best screw type for a secure attachment.
| Cabinet Material | Recommended Screw Type |
|---|---|
| Solid Wood & Plywood | Standard hinge installation screws |
| MDF & Particleboard | Screws with barbed plastic inserts (dowel screws) |
Using 8mm dowel screws for MDF and particleboard provides superior holding power and prevents material damage.
Step 1: Prepare the Cabinet Door
Precise preparation of the cabinet door is the foundation for a successful installation. Accurate measurements and clean drilling ensure the hinges function correctly and the door aligns perfectly.
Measure and Mark for the Hinge Cup
Proper hinge placement depends on the door's height, width, thickness, and weight. These factors determine the number of hinges needed to prevent sagging and ensure long-term durability.
An installer determines the number of hinges required based on door height:
Doors up to 60 inches (5 feet) need two hinges.
Doors between 60 and 90 inches (5 to 7.5 feet) need three hinges.
Doors over 90 inches require four or more hinges for adequate support.
For standard placement, mark the center point for the top hinge 5 to 7 inches from the top of the door. Mark the bottom hinge 10 to 11 inches from the bottom edge. If a third hinge is necessary, place its center mark exactly halfway between the top and bottom hinge marks.
Next, an installer must mark the distance from the side edge of the door. This is often called the "tab distance" or "boring distance." This measurement typically ranges from 3mm to 6mm. The specific distance depends on the hinge model and desired overlay.

The following table shows common boring distances for different hinge types.
| Hinge Boring Option | Tab Distance |
|---|---|
| A-03 (cup only) | 3mm (1/8") |
| A-05 (cup only) | 5mm (3/16") |
| B-03 (cup & dowel) | 3mm (1/8") |
| B-05 (cup & dowel) | 5mm (3/16") |
Note: Always consult the manufacturer's instructions for your specific hinge model. Using a concealed hinge jig simplifies this process, as it has preset guides for marking the correct distance automatically.
Drill the Hinge Cup Hole
Drilling a clean, flat-bottomed hole is critical for the hinge to sit flush. The most common diameter for residential hinge cups is 35mm. However, sizes can vary, with 26mm and 40mm options also available for different applications. The standard depth for a 35mm cup is approximately 12-13mm, but an installer should always measure the hinge cup to confirm.
For this task, a Forstner bit is the recommended tool. It excels at drilling precise, flat-bottomed holes without splintering the wood surface. This clean cut is essential for a professional finish.
Pro Tip: For maximum accuracy and safety, use a drill press with the Forstner bit. A drill press ensures the hole is perfectly perpendicular to the door surface. If a drill press is unavailable, a quality concealed hinge jig paired with a hand drill will also produce excellent results.
Set the drill press or drill stop to the required depth. Clamp the door securely to a workbench to prevent movement. Position the point of the Forstner bit directly on your center mark and drill the hole at a steady, slow speed. Clear any wood shavings from the hole to prepare it for the hinge.
Step 2: Install the Hinge on the Door
With the hinge cup holes drilled, the next phase is to mount the hinges securely onto the cabinet door. This step requires careful placement and proper fastening to ensure the hinge operates smoothly.
Insert the Hinge Cup
An installer first places the hinge cup into the hole drilled in the previous step. They press the hinge down firmly, making sure the cup sits completely flush with the surface of the door. The hinge flange should lie flat against the wood. A properly seated hinge prevents alignment issues later. The installer then aligns the hinge so it is perfectly square with the edge of the door. This alignment is critical for the door to hang straight.
Secure the Hinge with Screws
After positioning the hinge, the installer secures it with screws. Drilling pilot holes first is a recommended practice. Pilot holes prevent the wood from splitting and ensure the screws drive in straight.
An installer can use a self-centering drill bit, such as a #5 Vix bit, to create perfectly centered pilot holes.
Alternatively, they can use an awl to mark the center of each screw hole before drilling.
For soft brass screws, driving a steel screw first helps cut the threads and prevents the brass from shearing.
Pro Tip: When using a power drill, an installer should set the drill’s clutch to its lowest torque setting. They can gradually increase the torque if needed. This technique prevents stripping the screw heads or damaging the hinge hardware.
Finally, the installer drives the screws until they are snug. They avoid over-tightening, which could damage the door or the hinge.
Step 3: Install the Mounting Plate on the Cabinet
After preparing the door, an installer shifts focus to the cabinet frame. Correctly positioning the mounting plate is essential for the door to hang properly and align with the cabinet.
Measure and Mark the Cabinet Frame
An installer first determines the mounting plate's location on the cabinet's inside stile. The vertical position of the plate must align perfectly with the hinge on the door. They transfer the hinge center-line measurements from the door directly to the cabinet frame.
Next, the installer marks the setback from the front edge of the cabinet. A typical setback for mounting plates is 37mm. This distance ensures the door sits correctly when closed. However, this measurement can change based on the specific hinge and desired overlay.
Pro Tip: To guarantee accuracy, an installer can use a specialized template. Tools like the 'JIG IT® Hinge Plate Template J' or the 'Blum Mounting Plate Template' butt against the cabinet face to guide the drilling of perfectly positioned mounting holes.
Attach the Mounting Plate
With the locations marked, the installer attaches the mounting plate. There are several types of plates, including slide-on and clip-on versions. The TDC C82 Mounting Plate, for example, is a popular choice that comes in various thicknesses (0mm, 2mm, 4mm) to achieve the desired overlay.
The installer aligns the plate with the marks and drills pilot holes. They then secure the plate with the provided screws, driving them until they are snug. It is critical that the mounting plate sits perfectly level on the cabinet surface. An unlevel plate can cause hinge misalignment and lead to premature wear or failure. A level installation ensures the door operates smoothly for years to come.
Step 4: Hang and Adjust Your Residential Hinges
The final stage brings the project together. An installer hangs the door and makes precise adjustments. This step transforms a simple installation into a professional-quality cabinet upgrade.
Attach the Door to the Cabinet
An installer begins by connecting the door to the cabinet frame. They align the hinge arm with the mounting plate and click or slide it into place. A firm push often secures clip-on residential hinges with an audible click. The installer supports the door's weight during this process to prevent strain on the top hinge.
Pro Tip: When working alone, an installer can use a spacer like a block of wood or a squished paper towel roll to support the door from below. They rest the door on this support, attach the top hinge first, and then secure the bottom one. This method holds the door steady for perfect alignment.
It is crucial to use the correct number of residential hinges for the door's weight. Standard duty residential hinges typically support doors up to 200 lbs. Heavier doors require more robust hardware.

The table below shows the weight capacity for various hinge models.
| Hinge Model | Maximum weight of door leaf with 2 hinges (lbs) |
|---|---|
| PIVOTA DX 35 3D | 88 |
| PIVOTA DX 61 3D | 220 |
| PIVOTA DX 120 3D | 352 |
| PIVOTA DX 180 3D | 440 |
| PIVOTA DXS 300 Steel 3D | 770 |
How to Make Final Adjustments
Perfect alignment comes from adjusting the three screws on each hinge. An installer makes small, incremental turns and checks the door's position after each adjustment.
Height Adjustment Screw: This screw moves the door up or down. An installer turns it to correct a sagging door or to even the gap at the top and bottom.
Depth Adjustment Screw: This screw moves the door toward or away from the cabinet. It ensures the door closes flush against the frame.
Lateral Adjustment Screw: This screw shifts the door left or right. It is used to create consistent, even gaps on both sides of the door.
An installer adjusts the top and bottom hinges together to keep the door straight. They start with height, move to lateral position, and finish with depth. This systematic process ensures all gaps are uniform, giving the cabinets a clean, professional look.
An installer achieves a professional cabinet upgrade by following these steps. This simple project makes old cabinets appear cleaner and more modern. Remember that precise measurements and patient adjustments are the keys to success. Regular cleaning and tightening loose screws will ensure the hinges function smoothly for years, allowing an installer to enjoy the clean look of their work.
Related articles
-
.jpg)
Flawless Finishes How to Fit Concealed Hinges Fast
Get a flawless finish by learning how to fit concealed hinges with precision. This guide covers using a jig, drilling accurate cup holes, and making adjustments.Nov-17-2025 Learn More >> -

Key Features to Check Before Buying Door Gate Hinges
Select the right door gate hinges by calculating load capacity and choosing a material like stainless steel for durability. Consider the hinge type and pin for security.Nov-17-2025 Learn More >> -
Why Modern Homes Demand Upgraded Security Hinges
A standard door hinge is a weak point intruders exploit to bypass locks. A security hinge with non-removable pins and deep anchoring prevents this, securing the door.Nov-17-2025 Learn More >> -

The Essential Guide to Furniture Hinge Selection
Compare different types of furniture hinges, from concealed European to traditional butt hinges. This guide explains how to select the right hardware for your cabinet.Nov-17-2025 Learn More >>
Contact
Tel: +8613325838282
Add: 12819 Telegraph Road Santa Fe Springs, CA 90670
Follow Us:


