My Journey with Types of Furniture Hinges A Beginner's Success Story
A beginner achieved a professional finish on his cabinet project. He avoided common installation mistakes, which cause roughly 15% of all cabinet door misalignments. He selected the correct types of furniture hinges and used a jig for precise drilling.
Unlike simpler weld-on hinges, European hinges offer three-way adjustment. This feature guaranteed perfect door alignment and a flawless result.
Part 1: Choosing the Right Types of Furniture Hinges and Tools
A successful cabinet project begins long before the first screw is driven. The initial phase of selecting the correct hardware and gathering the right tools is critical. This preparation prevents common mistakes and sets the stage for a professional-quality finish. The beginner in our story understood this principle. He dedicated time to understanding the different types of furniture hinges and their specific applications.
Full Overlay, Half Overlay, or Inset?
The first major decision involves choosing a hinge that matches the cabinet's design. This choice depends on how the cabinet door sits in relation to the cabinet frame. There are three primary styles: full overlay, half overlay, and inset.
·Full Overlay Hinges: These allow the cabinet door to completely cover the cabinet's face frame or side panel. This style creates a seamless, modern look with uninterrupted surfaces. It is the only option for frameless cabinets, where hinges attach directly to the cabinet box side.
·Half Overlay Hinges: These are used when two doors share a single partition wall or face frame stile. Each door partially overlays the frame, leaving a portion exposed. This is a common solution for traditional or budget-conscious projects.
·Inset Hinges: These allow the door to sit perfectly flush inside the cabinet frame. Inset doors provide a high-end, custom furniture aesthetic. This refined look suits traditional, Shaker, or historic styles, though it slightly reduces interior storage space.
Cabinet construction is a key factor. Framed cabinets can accommodate various overlay hinges. Frameless cabinets, with their sleek design, exclusively use full overlay European-style hinges.
Pro Tip: To determine the correct overlay measurement, a woodworker can use one of two simple methods.
Tape Method:
1.Close the cabinet door.Place a piece of tape on the face frame, right against the door's edge.
2.Open the door and measure from the tape's inside edge to the cabinet opening. This distance is the overlay size.
Calculation Method:
1.Measure the total width of the cabinet door.
2.Measure the width of the cabinet opening.
3.Subtract the opening width from the door width.
4.Divide the result by 2. This gives the overlay size for one side.
Understanding these different types of furniture hinges ensures the door functions correctly and achieves the desired visual style.
Your Essential Tool Checklist
Proper tools are just as important as the right types of furniture hinges. Having everything ready minimizes errors and streamlines the installation process.
Core Tool List:
·Safety Glasses: Always the first and most important tool.
·Drill or Driver: For creating holes and driving screws.
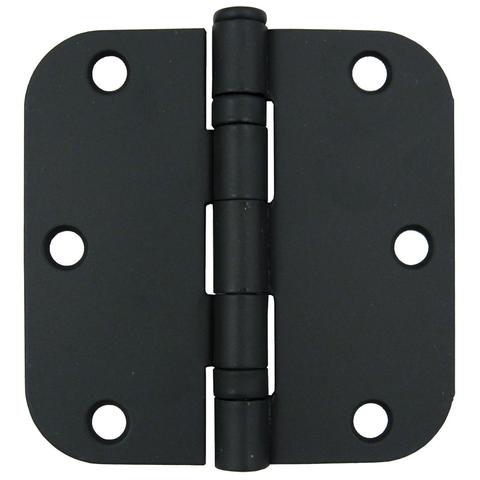
·35mm Forstner Bit: This is the industry standard for drilling the large cup hole required by most European hinges. Its design ensures a clean, flat-bottomed hole.
·Concealed Hinge Jig: This is a beginner's best friend. A jig guarantees perfectly placed, straight holes, eliminating guesswork and preventing costly slips that could ruin a cabinet door. Different jigs offer various features.
| Jig Name | Key Features | Best For Beginners |
|---|---|---|
| Basic Hinge Jig | Adjustable indexing guides, built-in scales | Guides allow for adjustable depths. |
| Compact Hinge Jig | Simple, adjustable design with included bit | Inexpensive and includes the Forstner bit. |
| Kreg Hinge Jig | High-quality build, adjustable guides | Brand quality and reliable depth control. |
·Tape Measure & Pencil: For double-checking measurements.
·Screwdriver: A Phillips head screwdriver is needed for manual adjustments.
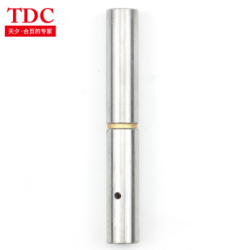
Many excellent hinge brands are available. A quick market analysis shows the prevalence of several key players. High-quality options from brands like these can be found at specialized suppliers such as TDC Hinge.
Choosing the correct types of furniture hinges and assembling the right tools are the foundational steps for a flawless installation.
Part 2: Installation and Perfect Alignment
With the correct hardware and tools selected, the project moves to the installation phase. This stage demands precision. A methodical approach to drilling, mounting, and adjusting ensures a professional outcome and avoids common pitfalls that can compromise the entire project.
Drilling the Hinge Cup Hole with a Jig
Drilling the hinge cup hole is the most critical step in the door preparation process. A concealed hinge jig is indispensable here. It removes guesswork and guarantees the hole is perfectly straight and positioned correctly. Using a jig helps a beginner avoid costly mistakes.
Common installation errors often stem from this stage. A woodworker must avoid them for a clean result.
·Incorrectly positioning hinge holes on the door can cause clearance issues.
·Making mounting holes a sloppy fit compromises the hinge's strength.
·Failing to account for the necessary gap between doors will prevent them from closing properly.
Safety is paramount when operating a power drill. The woodworker followed essential safety protocols to prevent injury.
·He ensured the 35mm Forstner bit was sharp and securely tightened in the drill's chuck.
·He wore impact-resistant safety goggles to protect his eyes from wood chips.
·He set the drill to a moderate speed, providing enough force without losing control.
The jig also helps set the 'tab setting,' which is the distance from the door's edge to the center of the cup hole. This distance varies based on the specific types of furniture hinges used. For example, some IKEA hinges require a 6mm offset. Other systems offer different standard boring options.
| Hinge Boring Option | Tab Distance |
|---|---|
| A-03 (cup only) | 3mm (1/8") |
| A-05 (cup only) | 5mm (3/16") |
| B-03 (cup & dowel) | 3mm (1/8") |
| B-05 (cup & dowel) | 5mm (3/16") |
He set the jig to the manufacturer's specified tab distance and drilled the cup holes on each door, creating a clean, flat-bottomed recess ready for the hinge.
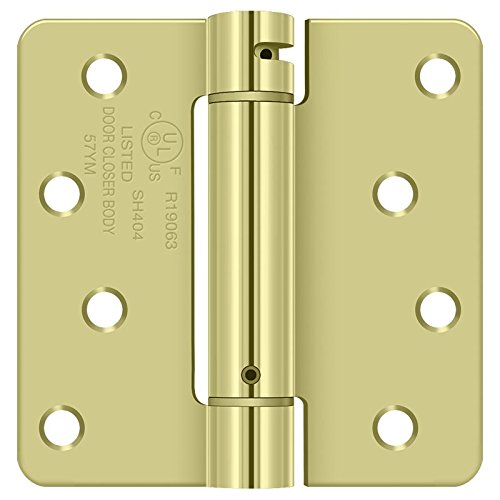
Installing the Mounting Plate
The mounting plate is the hinge's counterpart. It attaches to the cabinet body and connects to the hinge arm. The installation method depends entirely on the cabinet's construction.
·Frameless Cabinets: The mounting plate attaches directly to the front edge of the cabinet's side panel.
·Face Frame Cabinets: The mounting plate attaches to the cabinet's face frame.
Using the wrong plate or incorrect placement can cause significant issues. A face frame plate on a frameless cabinet will cause the door to protrude. Incorrect mounting can also prevent screws from fully engaging, creating a weak connection.
The choice of screw is also important. Materials like particleboard and MDF have poor holding power with standard wood screws. For these materials, a woodworker should use Euro screws. These fasteners have aggressive, wide threads that act like steel dowels, creating a very strong joint. For dense hardwoods, specialized screws with a self-drilling Type 17 Auger Point can drive in without a pilot hole, preventing the wood from cracking.
Attaching the Door and Making Adjustments
The final step is attaching the door and fine-tuning its position. The beginner clipped the hinge arm on the door onto the mounting plate on the cabinet. With the door hung, he began the adjustment process to achieve perfect alignment and even gaps. European hinges offer three-way adjustment, giving complete control over the door's final position.
He followed a logical sequence for a perfect fit.
1.Initial Assessment: He first closed the door to identify any major alignment issues. He checked if the door was sagging, crooked, or not flush with the cabinet.
2.Height Adjustment (Up/Down): He located the oblong mounting holes on the plate. By slightly loosening the plate's screws, he could slide the entire door up or down to align it with adjacent doors or the cabinet top. He then retightened the screws.
3.Lateral Adjustment (Left/Right): He used the 'Lateral Adjustment Screw' to shift the door side-to-side. This screw is typically on the hinge arm. Turning it moves the door left or right, allowing him to create a consistent vertical gap between doors.
4.Depth Adjustment (In/Out): Finally, he turned the rear screw on the hinge arm. This adjustment moved the door closer to or further from the cabinet face, ensuring it sat perfectly flush when closed.
Patience is Key: The beginner made small, incremental turns to each screw. He checked the alignment after each minor adjustment. This patient approach is the secret to achieving the flawless, professional look that makes these types of furniture hinges so popular.
A woodworker achieves success by selecting the correct hinge, using a jig for drilling accuracy, and patiently making final adjustments. This knowledge empowers any beginner to install European hinges and attain a professional finish on their own cabinet projects, transforming a simple task into a demonstration of true craftsmanship.
FAQ
What should a woodworker do if a cabinet door sags?
A woodworker corrects a sagging door using the height adjustment. He slightly loosens the mounting plate screws, lifts the door into position, and then retightens the screws securely.
Can a person reuse old screw holes for new hinges?
Reusing old holes is not recommended. They often provide a weak fit. A craftsman should fill old holes with wood filler and drill new pilot holes for a strong installation.
Where can someone find the best types of furniture hinges?
Specialized suppliers like TDC Hardware offer a professional selection. They provide various hinge types and expert guidance, ensuring a woodworker finds the perfect hardware for any cabinet project.
Related articles
-
Top Tips for Choosing Residential Pivot Hinges in 2025
Residential pivot hinges offer smooth operation, modern style, and durability. Find top tips for choosing the best hinges for your home in 2025.Oct-15-2025 Learn More >> -
Residential Interior Door Hinges You will Love This Year
Find the best residential interior door hinges by comparing materials, styles, and installation tips for smooth, secure, and stylish home doors.Oct-15-2025 Learn More >> -
Why Choosing the Right Residential Security Hinges Matters for Your Family
Residential security hinges strengthen doors, prevent forced entry, and provide peace of mind for families seeking reliable home safety.Oct-15-2025 Learn More >> -

10 High-Quality Bronze Hinges for Every Door
Our 2025 review of bronze door hinges covers the top 10 models for every need, from heavy-duty exterior doors to decorative interior styles. See our picks.Oct-15-2025 Learn More >>
Contact
Tel: +8613325838282
Add: 12819 Telegraph Road Santa Fe Springs, CA 90670
Follow Us:


