Mastering the Art of Cutting Hinges for Doors
Mastering the Art of Cutting Hinges for Doors
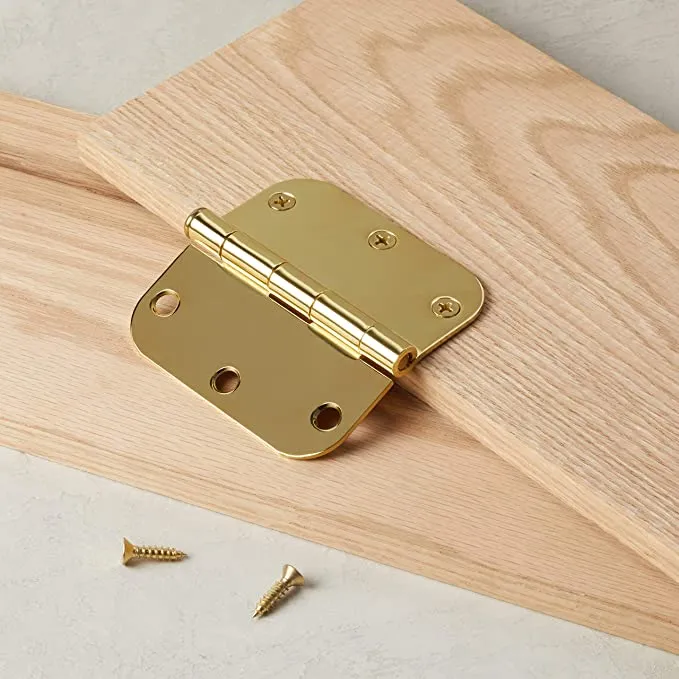
Accurate cutting hinges for door installation demands careful measurements, reliable tools, and a step-by-step approach. Precision ensures doors function smoothly and look seamless. With the right guidance, anyone can achieve a professional finish. High-quality door hinges, such as TDC stainless steel hinges, offer superior strength and corrosion resistance, supporting years of reliable performance in any environment.
Choosing the right hinge material matters for durability:
Material | Rust Resistance | Best Use Cases |
|---|---|---|
Stainless Steel | Excellent | Outdoor, coastal areas |
Galvanized Steel | Good | Residential, general use |
Brass/Bronze | Moderate | Decorative, vintage |
TDC stands out as a leading provider of advanced hinge solutions, trusted for both residential and commercial projects worldwide.
Why Precision Matters
Door Functionality
Precision in cutting hinges directly impacts how a door operates. Even a small error can lead to a range of functional problems. Properly aligned hinges ensure smooth movement and long-term reliability. Inaccurate cuts often result in issues that affect daily use and can cause frustration or even damage over time.
Common Issue | Causes |
|---|---|
Squeaky Hinges | Lack of lubrication, dirt buildup, wear and tear |
Misaligned Door Hinges | Improper installation, loose screws, warped or damaged door |
Door Dragging or Sticking | Sagging hinges, incorrect door size, warping or swelling |
Broken or Damaged Hinges | Excessive force, rust and corrosion, old or worn-out hinges |
Tip: Using TDC high-quality hinges, such as TDC stainless steel hinges, helps prevent many of these problems by providing smooth operation and lasting durability.
Appearance and Fit
Accurate hinge placement is essential for both the look and fit of a door. When hinges are installed at the correct height and depth, the door sits flush within the frame and opens with ease. Misaligned hinges can cause the door to sag or appear uneven, which detracts from the overall appearance and may lead to premature wear. In both residential and commercial settings, precise hinge cuts maintain the door’s visual appeal and ensure efficient operation. A well-fitted door not only looks professional but also functions reliably for years.
Cutting Hinges on a Door: Tools & Materials
Selecting the right tools is the foundation for cutting hinges on a door with accuracy and efficiency. Each step, from marking to chiseling, depends on the quality and suitability of your equipment. TDC offers a wide range of hinge options, including stainless steel and customizable finishes, ensuring that your project meets both functional and aesthetic requirements.
Measuring and Marking Tools
Precision starts with proper measuring and marking. Cutting hinges on a door requires exact lines and measurements to guarantee a professional fit. The following table compares essential tools for this task:
Tool | Precision Level | Description |
|---|---|---|
Marking Gauges | High | Create exact lines for joinery cuts |
Marking Knives | High | Provide a physical reference for lines |
Combination Squares | Medium | Useful for marking angles and checking alignments |
Precision Triangles | Medium | Ensure accurate angles in cuts |
Digital Calipers | High | Measure thickness and depth with high accuracy |
Marking knives and gauges eliminate guesswork, making sure that every cut for hinges on a door is clean and precise.
Chisels, Routers, and Jigs
Cutting hinges on a door often involves a combination of chisels, routers, and a hinge template. Chisels allow for detailed work, while routers speed up the process and provide consistent depth. A hinge template ensures repeatable results, especially when cutting hinges on a door in bulk or for commercial projects. The table below outlines the advantages and disadvantages of these tools:
Advantages | Disadvantages |
|---|---|
Precise cutting | Routers may wear down with heavy use |
Saves time | Jigs can be heavy or less flexible |
Durable and strong | Clamps may affect door finish |
Using a hinge template with your tools increases accuracy and reduces errors when cutting hinges on a door.
Safety Gear
Safety is critical when cutting hinges on a door. Common injuries include cuts, lacerations, and strains. Always use the following personal protective equipment:
Gloves
Goggles
Face shields
High-quality hinges, such as TDC stainless steel hinges, meet industry standards for strength and corrosion resistance. TDC also provides customization options, including soft-close and snap-close features, to match any door style or requirement.
Tip: Cutting hinges on a door with the right tools and safety gear ensures a smooth installation and long-lasting performance.
Cutting Hinges for Door: Step-by-Step
Preparation and Safety
Preparation forms the foundation for cutting hinges on a door with precision and safety. Begin by gathering all necessary tools, including chisels, marking gauges, routers, and templates. Ensure that each tool is clean and sharp. Select the chisel size based on the hinge dimensions and the specific project requirements. Secure the door firmly using clamps to prevent movement during the process. Always wear safety glasses and gloves to protect against wood chips and accidental slips. Set up a dust collection system, such as a vacuum cleaner, to maintain a clean workspace and reduce inhalation risks. Use hearing protection and a dust mask if power tools are involved. A sharp chisel not only improves accuracy but also reduces the risk of accidents. Contractors recommend checking that all equipment is within reach before starting to avoid interruptions and maintain focus.
Tip: Safety and preparation are essential for cutting hinges on a door accurately. Secure the workpiece and wear protective gear to minimize risks.
Marking Hinge Placement
Marking hinge placement is a critical step in cutting hinges for door installation. Begin by measuring the exact locations for each hinge on both the door and the frame. Maintain proper spacing, typically 5-7 inches from the top and 10-11 inches from the bottom, to ensure stability and prevent sagging. Use a marking gauge or utility knife to create clear guidelines for mortising. These lines serve as a reference for where to cut out notches. Place the hinge against the marked area and trace its outline for a precise fit. Contractors emphasize the importance of checking alignment with a level before proceeding. Pre-drill holes for screws to prevent wood splitting and ensure straight insertion. Double-check measurements to avoid misalignment, which can lead to operational issues.
Mark the area using a marking gauge or knife.
Trace the hinge outline for accurate placement.
Check alignment with a level.
Pre-drill screw holes.
Confirm spacing and depth.
Note: Accurate marking prevents errors and ensures that cutting hinges on a door results in a professional finish.
Scoring and Removing Material
Scoring and removing material requires careful technique to achieve clean and consistent mortises. Start by scoring the outline of the hinge with a marking knife. This step helps prevent wood fibers from lifting during chiseling. Use a Forstner bit and a felt-tip marker to mark the mortise depth for precision. Drill slowly and maintain a steady hand to avoid uneven surfaces. Remove material in layers, making multiple light passes with a sharp chisel. Cutting hinges for door installation demands attention to grain direction; always cut parallel to the grain to minimize tear-out. Clean up waste material in the corners with the chisel for a neat finish. Contractors often use hinge jigs or routers for larger projects, which provide consistent depth and speed up the process. When cutting hinges on a door, depth consistency is crucial. Use a depth gauge or tape to ensure uniform mortising.
Step | Technique Description |
|---|---|
1 | Accurately mark mortise depth using a Forstner bit and felt-tip marker. |
2 | Drill slowly and maintain a steady hand for consistent depth. |
3 | Use a sharp chisel to clean up corners and remove waste material. |
Tip: Remove material in layers and always test fit the hinge after cutting hinges on a door to ensure proper placement.
Cleaning and Test Fitting
Cleaning and test fitting are essential for achieving a flawless installation. After you cut out notches for the hinges, wipe away dust, dirt, and any old grease from the mortise area. This step ensures smooth operation and prevents binding. For rusty hinges, apply rust remover or use fine steel wool before adding lubricant. Place the hinge into the mortise and check for a snug fit. If the hinge does not sit flush, remove additional material in small increments. Properly installed hinges allow the door to swing open smoothly without sticking. Correct alignment prevents sagging and scratching, which can lead to costly repairs. Contractors recommend always test fitting after cutting hinges on a door to confirm that the hinge sits perfectly and the door operates as intended.
Clean the mortise area thoroughly.
Test fit the hinge for flush placement.
Adjust as needed for perfect alignment.
Apply lubricant for smooth operation.
Note: Cleaning and test fitting after cutting hinges for door installation ensures long-term reliability and professional results.
Installing Door Hinges
Attaching Hinges to Door
The door installation process begins with attaching door hinges to the prepared mortises. Start by positioning the hinge in the mortise and anchoring it with the middle screw. This prevents shifting during the installation. Use a measuring tape to mark hinge locations accurately. Employ a level to ensure the hinges are installed straight. Drill pilot holes for each screw to guarantee they are driven in straight and avoid splitting the wood. Tighten screws carefully, avoiding overtightening, which can damage the wood and compromise the successful installation. Contractors recommend using temporary screws while fitting the door to check alignment before final fastening. Proper alignment ensures smooth operation and maintains structural integrity.
Tip: Always double-check hinge placement and screw tightness to achieve a successful installation and extend the lifespan of both the hinges and the door.
Securing Hinges to Frame
After attaching the hinges to the door, align them with the frame to continue the door installation process. Mark the positions for the hinge plates on the frame, then cut matching mortises using sharp chisels. Clean out the mortises to ensure a snug fit for the hinges. Place a support under the door to relieve tension during installation. Insert shims between the hinge leaf and the frame if needed to eliminate binding and achieve optimal clearance. Regularly check alignment with a level to ensure vertical and horizontal accuracy. Secure the hinge plates with screws, tightening them carefully for a successful installation. Remove the support and check the door’s motion and clearance.
Step | Action |
|---|---|
1 | Mark hinge positions on frame |
2 | Cut matching mortises |
3 | Place support under door |
4 | Insert shims if needed |
5 | Secure hinge plates with screws |
Note: Clean mortises and precise alignment are essential for a successful installation and smooth door operation.
Tips and Mistakes to Avoid
Consistent Depth
Maintaining a consistent depth when mortising for door hinges is essential for both appearance and function. If the mortise is too deep, the hinge will sit below the surface, causing the door to bind or drag. If it is too shallow, the hinge will protrude, preventing the door from closing properly. Adjust the depth by checking the fit after each pass with your chisel or router. Many professionals recommend mortising to about 1/8 inch for most standard hinges. Use the depth adjustment screw on adjustable hinges to fine-tune the fit and ensure the door sits flush with the frame. This attention to detail supports proper alignment and smooth operation.
Preventing Splintering
Splintering can ruin the look of a finished door and weaken the mortise area. To prevent this, apply painter’s masking tape along the cut lines before you begin. This simple step helps keep the wood fibers in place. Clamp a shoot board to guide your chisel or saw for a clean, straight edge. For power tool users, set the blade depth shallow for the first pass to create a splinter-free edge. These tips for cutting hinges help maintain the integrity of the wood and produce a professional result.
Common Alignment Errors
Proper alignment is critical for long-lasting door performance. Misaligned hinges can cause doors to twist, bind, or wear unevenly. To achieve proper alignment, measure and mark hinge positions with a tape measure. Use a laser level for vertical accuracy. Install the top hinge first, then the bottom, adjusting the middle hinge as needed. Insert spacers to maintain uniform gaps. Test the door by opening and closing it slowly, making adjustments until the door moves smoothly. Consistent attention to proper alignment prevents premature wear and ensures reliable operation of your door hinges.
Troubleshooting & Adjustments
Fixing Overcuts or Undercuts
Mistakes can happen during hinge mortising. Overcuts leave gaps, while undercuts prevent the hinge from sitting flush. To fix an overcut, fill the gap with wood filler or a custom-cut wood patch. Allow the filler to dry, then sand it smooth before reinstalling the hinge. For undercuts, remove additional material carefully using a sharp chisel. Test fit the hinge after each adjustment to avoid removing too much. Contractors recommend using a depth gauge to check progress. If the damage is severe or the door’s structure is compromised, consult TDC experts for guidance on hinge selection or repair solutions.
Tip: Always work in small increments and check the fit frequently. This prevents further errors and ensures a professional finish.
Realigning Hinges
Misaligned hinges cause doors to stick, sag, or fail to close properly. Realignment restores smooth operation and extends hinge life. The following steps help correct hinge placement:
Tighten all loose screws. If a screw hole is stripped, fill it with wood glue and toothpicks, then reinsert the screw.
Loosen hinge screws, shift the hinge to realign the door, and retighten.
Insert thin shims behind the hinge leaf to fine-tune alignment.
Use an adjustable wrench to gently bend the hinge for minor adjustments.
Essential tools include a Phillips screwdriver, hammer, level, shims, adjustable wrench, and wood glue. Hinge shims offer a quick solution for minor misalignment without removing the door. For complex adjustments or persistent issues, TDC experts can provide specialized advice and support.
Note: Severe damage, structural compromises, or complex installations warrant professional assistance. TDC’s team ensures optimal hinge performance and reliable solutions for any project.
Achieving professional results when cutting and installing door hinges requires precision and the right tools. Attention to detail ensures smooth operation and enhances aesthetics. TDC hinges deliver superior durability and rust resistance. For optimal performance, follow each step carefully and select high-quality hinges engineered for lasting reliability.
FAQ
How do you cut for hinges on a door?
Measure hinge locations. Mark outlines with a gauge. Use a chisel or router to create mortises. Test fit hinges for flush placement.
What is the best way to cut a door for hinges?
Use a hinge template for accuracy. Score the outline. Remove material in layers with a sharp chisel. Clean mortises before installing hinges.
How can you cut out a door for hinges safely?
Always secure the door with clamps. Wear safety goggles and gloves. Work slowly with sharp tools to prevent slips and splintering.
Related articles
-

Choosing the Right Exterior Hinges for Your Home: Key Features to Consider
Choose hinges exterior that offer rust resistance, security features, and proper fit to ensure long-lasting protection and smooth operation for your home's doors.Apr-23-2026 Learn More >> -
Discover the Enduring Beauty of Antique Brass Door Hinges
Antique brass door hinges add timeless elegance, durability, and versatile style to any home, elevating both visual appeal and long-term value.Apr-23-2026 Learn More >> -

The Benefits of Using Commercial Spring Hinges for Your Business
Commercial spring hinges boost business safety, cut maintenance costs, and ensure smooth, automatic door closing for efficient daily operations.Apr-23-2026 Learn More >>
Contact
Tel: +8613325838282
Add: 12819 Telegraph Road Santa Fe Springs, CA 90670
Follow Us:


